This is "Module 3 – Create Workflows in Microsoft Flow", which is part of a series on "How to Integrate Microsoft Project and Microsoft Planner".
This article will guide the user through creating two workflows. The "When an item is created" workflow will create a new Planner task when a task is created within Microsoft Project.* The "When a task is complete" workflow will transfer the actual Finish date from Planner into Microsoft Project and mark the task as 100% Complete.*
*Note that it requires clicking on Save within Project for the data to transfer.
When item is created Workflow
7. Within Flow, from My Flows, click on New and create from blank
8. Type in SharePoint and select the trigger option for "When an item is created"

9. Click in the Untitled name and input "When an item is created", then click on Save

10. Input the name of your SharePoint site as well as Task List

11. Click on Next step
12. Type in Planner and select Create a task

13. Within the Plan id field input the name of your project. In this example mine is named My Project.

14. Click within the Title field. The Dynamic Content dialogue box will appear. Select Task Name

15. Within the Bucket id, choose To do

16. Within the Assigned User Id, choose Assigned To Email from the Dynamic content list

17. The Apply to each will automatically appear. Click on Save.

When a task is completed Workflow
18. Within Flow, from My Flows, click on New and create from blank
19. Type in Planner, hit Enter and select the trigger option for "When a task is complete"

20. Input the name of your Plan within Plan Id. Input the name of this workflow under untitled as "When a task is complete". Click on Save. Then click on New step.

21. Type in "get items" and click on the Get Items option for SharePoint.

22. Input the Site Address of the SharePoint site and List Name. Then click on Next Step

23. Click in the Search box and choose Condition

24. Click in the box on the left and chose the Task Name value from the Dynamic content

25. Ensure the variable is set to "is equal to". Click in the box on the right and select value Title from the Dynamic content list.

26. Below the if yes option, click on Add an action, then type in SharePoint and choose Update item.

27. Input the SharePoint Site Address as well as the List Name. For id, input the SharePoint ID field from Dynamic content. For Task Name, input the SharePoint Task Name. For Due Date input the value Due Date Time from Planner Dynamic content.

28. Input Task Status Value as Completed. Input % Complete as 1

29. Click on Save.
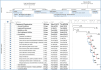
30. You should now have two Workflows within My Flows:

See next article: Module 4 – Build The Team
Note: You may find this of value: